How to connect TrackSo data logger to WiFi Network
Introduction
Multiple methods exists for updating network WiFi SSID & Password in TrackSo WiFi Data Loggers. You can choose any of the below method as per your convenience
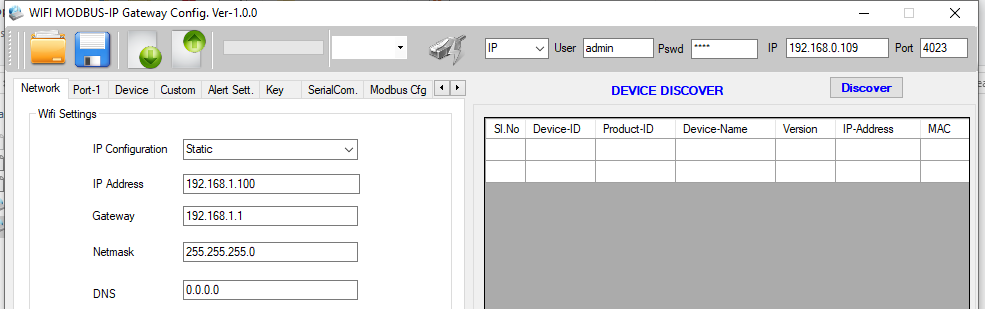
Below method also allows you to update the Network mode (DHCP/Static)
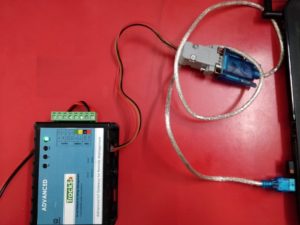
Method-1 Via USB to RS232 Cable
1) Download and Install USB to RS232 Driver (Used for Connecting Laptop to Logger) – Link
Note: Download Version as per your OS (above link is suitable for Windows)
2) Connect TrackSo Data Logger to Laptop using USB to RS232 Cable.
3) Download and Run TrackSo Utility available at this- Link
4) Open the TrackSo Utility as below.
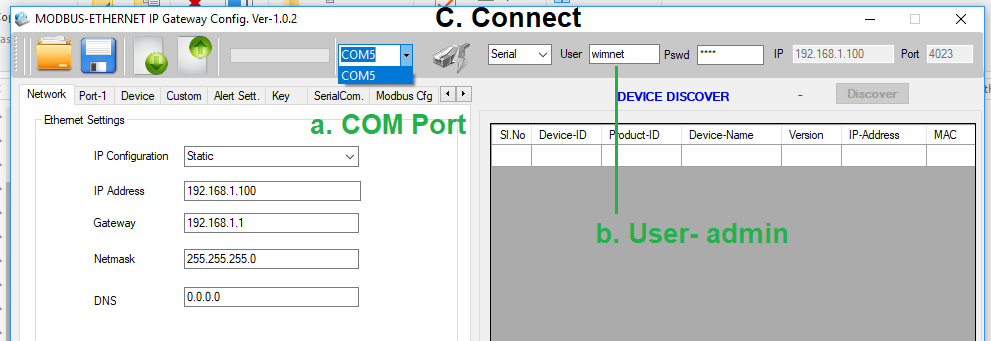
a) Check the COM port displayed in Utility. (If COM port is not displayed then either the USB to RS232 cable is not connected or Drivers are not installed
b) Update the User to admin
c) If the above steps are completed then Click on Connect.
5) Connect OK will be displayed once the connection is successful
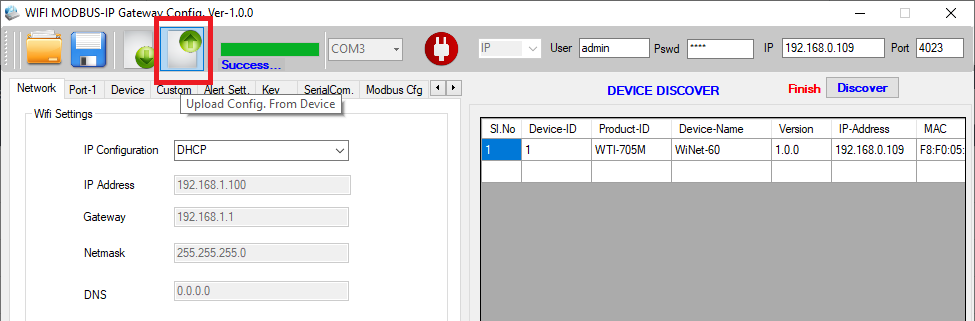
6) Click ok Upload Config from Device to Load Current Config.
Note: If by mistake customer clicks on the button nearby whole device will get reset.

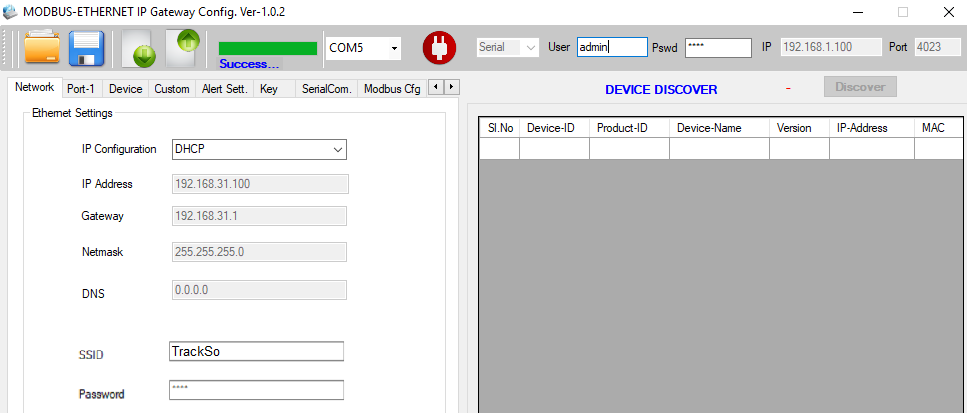
7) Update WiFi SSID,Password or the IP Configuration required
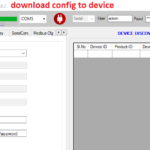
8) Click on Download Config to Device.
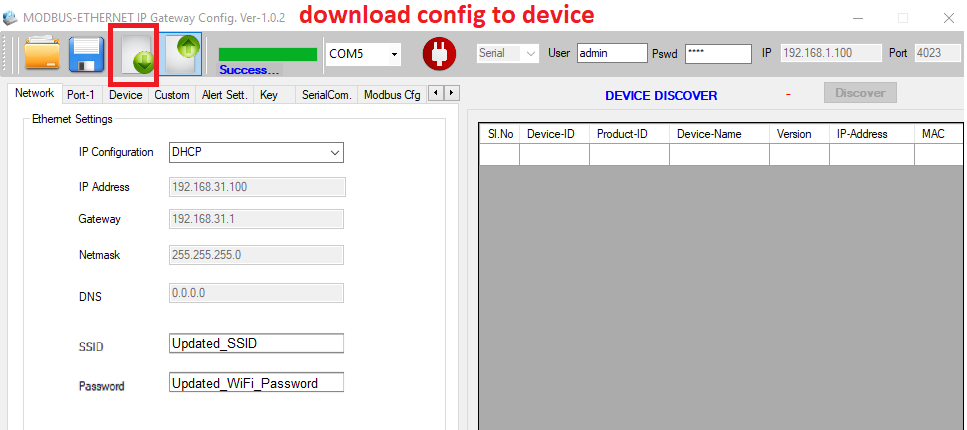
Settings have been completed. Restart data logger and test
9) Move to Status Tab and click on read at the botton of the utility. Wifi & Server Status should get updated to Connected.
WiFi Status- Connected to WiFi or not
Server Status- Internet available & connected to server or not

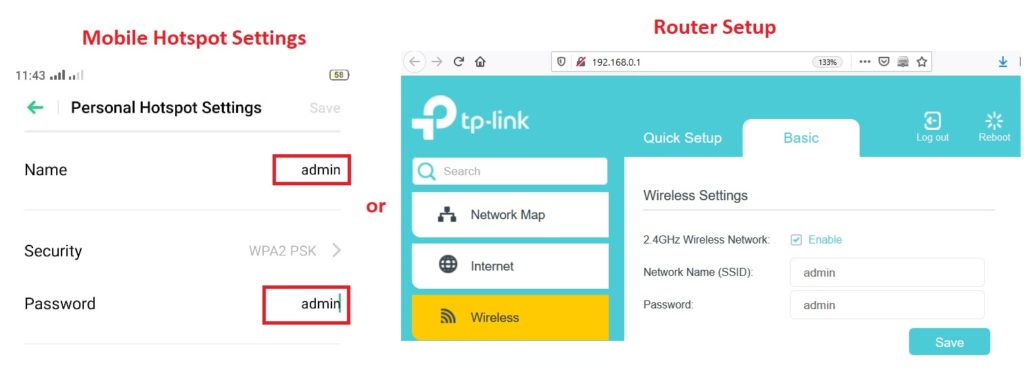
Method-2 via Mobile Hotspot or a router
By default when device is shipped with Settings to connect Wifi with SSID-admin and Password-admin
1) Setup a Mobile Hotspot or a router with SSID- admin and password- admin
2) Switch on the device and it should automatically get connected to the WiFi. Check connected devices to verify the same
3) Open the connected devices list to identify the IP assigned by the network to device.
a) if trying via Hotspot- Download fing app to identify the devices connected in network. (use on same device from which hotspot is created)
b) if trying via Router- Open the admin page of the router and login (Example:admin page of router- 192.168.0.1) and visit the connected devices page
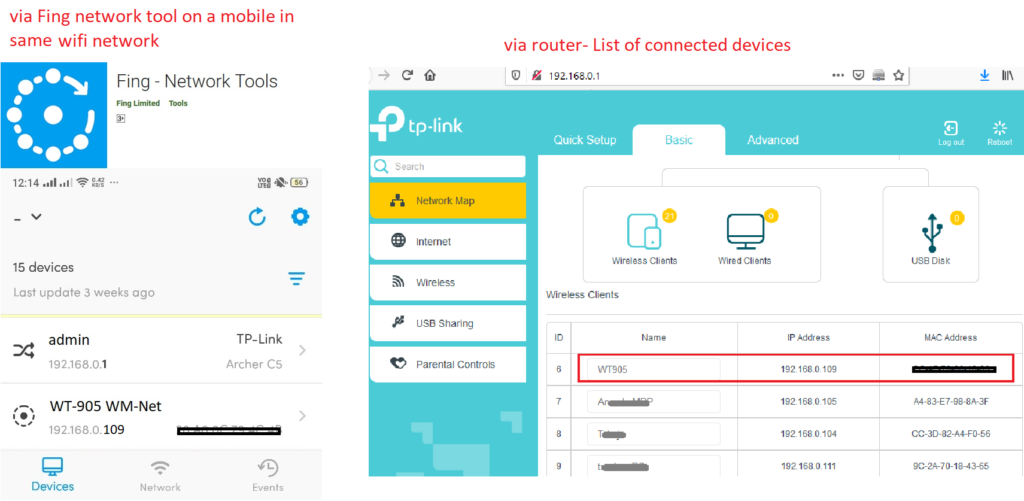
4) App or Router will display the IP Assigned to the Device.
Example Ip in above Screenshot- 192.168.0.109
5) Open the TrackSo Utility and change the connection type to IP
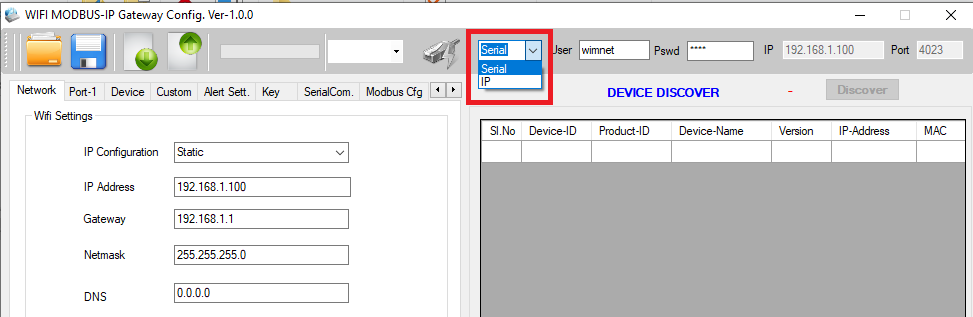
6) Update the user to admin and update the IP as obtained in the above step
7) Once the required details are submitted click on Connect
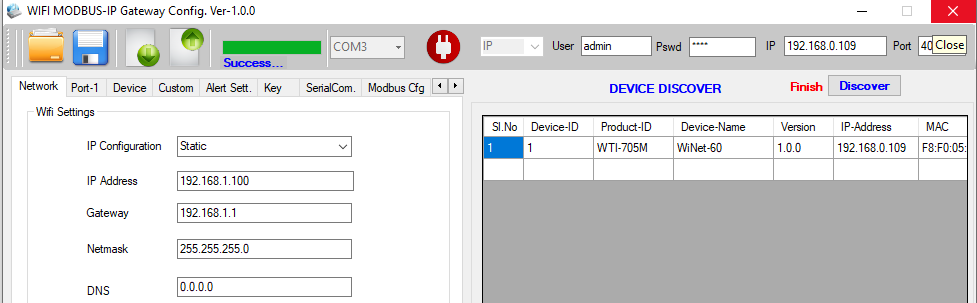
If device doesn’t get connected then click on discover to check if device is appearing in it or not. If not then repeat the process again.
8) Click on Upload to get current config in Device and change the settings as required.
9) Update the SSID details and password as required and download the config to the device.

Settings have been completed. Restart data logger and test
10) Move to Status Tab and click on read at the bottom of the utility. Wifi & Server Status should get updated to Connected.
WiFi Status- Connected to WiFi or not
Server Status- Internet available & connected to server or not